
Nail art at home offers a canvas for self-expression and creativity, allowing individuals to showcase their style through colors, patterns, and designs. Not only a means of artistic output, simple nail art crafted in the comfort of one’s own space brings with it benefits such as significant cost savings and the convenience of not having to schedule salon appointments.
Tips for beginners looking to delve into this creative endeavor should be heartened to know that intricate skills are not a prerequisite. With accessible guidance and a willingness to experiment, anyone can achieve eye-catching nail art. The key is to start with basic techniques and gradually build up to more complex designs.
For those interested in a deeper dive into the world of manicures, exploring resources like The Ultimate Guide to Acrylic Manicures in Honolulu can be incredibly enlightening. This guide provides valuable information on choosing the best Honolulu nail salon for acrylic nails and manicures.
And for those eager to keep up with the cutting edge of style, staying updated on Honolulu Nail Art 2024: The Latest Trends You Need to Try will provide plenty of inspiration. Get ready to embrace vibrant colors, unique textures, and minimalist styles for a stunning manicure as you discover the latest nail art trends in Honolulu for 2024.
Getting Started with Basic Nail Art Techniques
Nail art is a fun and creative way to express yourself through your nails. Whether you’re a beginner or an experienced nail artist, knowing the basic nail art techniques is essential. In this guide, we’ll walk you through some easy yet impressive techniques that you can try at home, along with the tools you’ll need to get started.
Mastering Essential Skills
Dotting Technique
The dotting technique is one of the simplest yet most versatile nail art techniques out there. It involves creating various designs using dots of different sizes. Here’s how you can do it:
- Apply a base coat and let it dry.
- Dip a dotting tool or a bobby pin into a contrasting polish color.
- Gently place dots onto your nails in any pattern you like.
- Finish with a clear topcoat to seal the design.
Pro Tip: Start with simple patterns like flowers or polka dots before moving on to more complex designs.
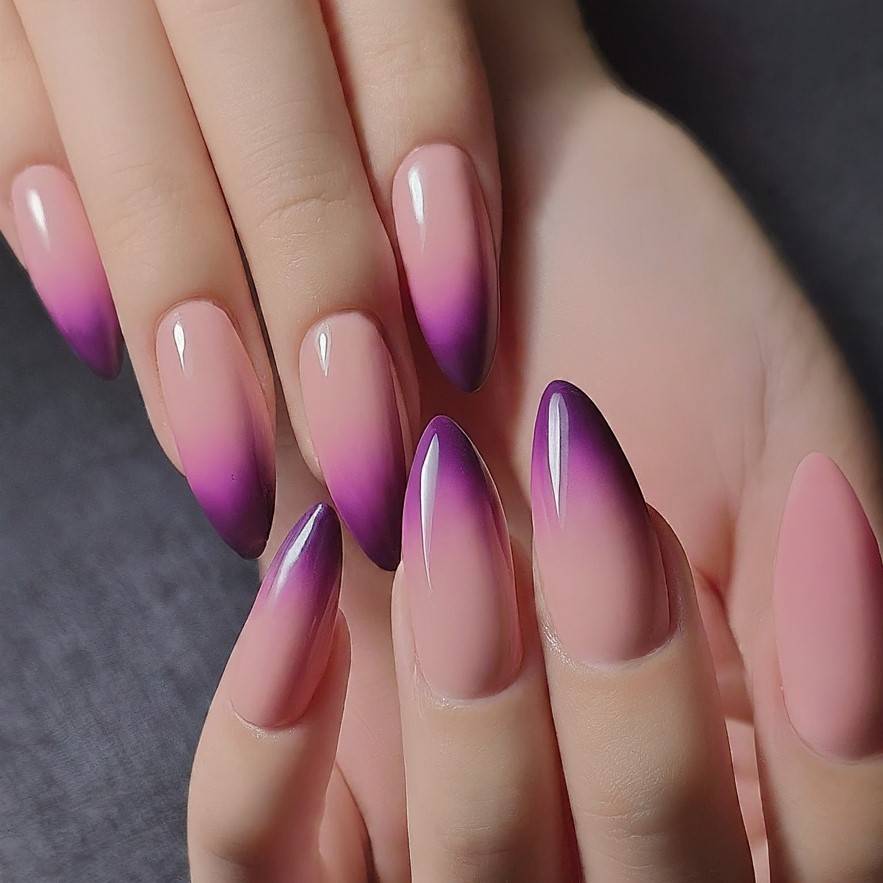
Gradient Technique
The gradient technique, also known as ombre nails, creates a beautiful transition of colors on your nails. Here’s how you can achieve this look:
- Paint your nails with the lightest color as the base.
- On a makeup sponge, apply the colors side by side, slightly overlapping them.
- Dab the sponge onto your nails, creating a gradient effect by blending the colors.
- Apply a topcoat for a smooth finish.
Pro Tip: Use tape around your nails to minimize cleanup.
Accent Nails
Accent nails are a great way to add some extra flair to your manicure. They involve painting one nail differently from the rest, either with a different color or design. Here’s how you can create accent nails:
- Paint all your nails except for one in a single color.
- Choose a different color or design for the accent nail—this could be glitter, stripes, or anything that stands out!
- Seal everything with a topcoat.
Pro Tip: The ring finger is commonly used for an accent nail due to its visibility.
Must-Have Tools and Materials
Before you start experimenting with nail art, make sure you have these essential tools and materials on hand:
- Polish Colors: A selection of your favorite shades.
- Top Coat & Base Coat: To protect your nails and make your manicure last longer.
- Dotting Tool or Bobby Pin: For creating dots of different sizes.
- Striping Tape: To create precise lines and shapes.
- Makeup Sponge: Essential for gradient looks.
Each tool has its purpose:
- Polish Colors let you play with different designs and styles.
- Top Coats & Base Coats not only add shine but also prevent chipping.
- Dotting Tools allow precision in creating polka dots or intricate details.
- Striping Tape helps achieve clean lines that might be challenging freehand.
- Makeup Sponges are key in blending colors smoothly for gradient effects.
Tips for Using Nail Art Tools
To make the most out of your nail art tools, here are some tips to keep in mind:
- Practice using each tool on paper before applying it to your nails. This will help you get a feel for how much pressure to
10 Simple and Stylish Nail Art Ideas for Beginners
Diving into the world of nail art can be as simple or as intricate as you desire. For those starting out, easy simple nail art is the gateway to exploring your creative self. Here are ten beginner-friendly nail art designs that promise to add a touch of elegance and fun to your nails.
1. Polka Dot Party
- Tools: Dotting tool or bobby pin
- Steps:Paint your nails with a base color and let it dry.
- Dip your dotting tool in a contrasting polish and create dots on each nail.
- Seal the design with a clear top coat for durability.
2. Classic French Manicure
- Tools: Nail strips or tape
- Steps:Apply a pale pink or clear base coat and wait for it to dry.
- Place nail strips near the tips of your nails, leaving a small gap.
- Paint the tips white, then remove the strips carefully.
- Finish with a top coat for a glossy sheen.
3. Gradient Glory
- Tools: Sponge, two polish colors
- Steps:Paint your nails with the lighter color as a base and let it dry.
- Apply both colors side by side on the sponge and dab it onto your nails until you achieve the desired gradient effect.
- Use a top coat to blend and protect the design.
4. Subtle Sparkle Accent
- Tools: Glitter polish, brush
- Steps:Choose one nail as an accent (commonly the ring finger) and apply a base color on all nails.
- On the accent nail, add glitter polish either over the entire nail or as an ombré effect towards the tip.
- A clear top coat will keep everything in place.
5. Geometric Chic
- Tools: Tape or striping tape, two polish colors
- Steps:Start with a solid base color.
- Once dry, use tape to create geometric shapes like triangles or stripes on each nail.
- Fill in these shapes with another color, remove tape, and seal with a top coat.
6. Lovely Lace Detail
- Tools: Lace sticker or stamping kit
- Steps:Apply base color and wait for it to dry completely.
- Place lace sticker over the nail or use a stamping kit with lace design to transfer the pattern.
- Apply top coat to secure the lace detail.
7. Minimalist Lines
- Tools: Striping brush or fine liner brush
- Steps:After your base coat dries, use your brush to draw thin, straight lines across each nail in varying directions.
- Experiment with different colors for an added pop.
- A quick-dry top coat will smooth out any imperfections.
8. Marbled Magic
- Tools: Tooth
Exploring Advanced Techniques and Creative Trends in Nail Art
Nail art is not just about painting your nails. It’s a way to express your personal style, creativity, and even your mood. As you gain confidence with basic techniques, it’s time to explore some advanced nail art techniques. These methods may seem daunting at first, but with practice, you can create intricate designs that are sure to impress.
Stamping
Stamping is a popular technique that allows for precision and consistency in your nail art. It involves using a metal plate engraved with various designs, a rubber stamper, and special stamping polish. The process is simple:
- Apply the stamping polish over the design on the plate.
- Scrape off the excess polish.
- Press the stamper onto the plate to pick up the design.
- Stamp the design onto your nail.
Freehand Painting
For those who love drawing or painting, freehand nail art can be an exciting challenge. This technique provides endless possibilities for customization – from minimalist line art to detailed landscapes.
To get started with freehand painting:
- Ensure your base polish is completely dry.
- Use a thin brush dipped in acrylic paint or polish to draw your desired design.
- Let each layer dry before adding more details.
- Seal your artwork with a top coat.
3D Embellishments
Adding 3D elements can elevate your design and give it a unique depth and texture. You can use rhinestones, studs, pearls, or even dried flowers for this purpose.
Here’s how:
- Apply clear nail glue where you want to place the embellishment.
- Using tweezers, carefully place the item onto the glue.
- Let it dry completely before applying a top coat.
As you perfect these advanced techniques, don’t forget about staying inspired by exploring creative nail art trends. Nail art, like fashion, is always evolving. Here are a few current trends to experiment with:
- Negative Space Nail Art: This style incorporates areas of the nail left unpainted or clear, creating a unique contrast with the rest of the design.
- Graphic Lines and Shapes: Geometric patterns and bold lines can create striking, modern designs.
- Textured Polish: Polishes with glitter, sand, or foil effects can add an interesting dimension to your nails.
Remember, nail art is a form of self-expression – there are no strict rules. Feel free to adapt these trends to suit your personal style.
Taking Your Nail Art to the Next Level: Understanding Color Theory and Composition
Mastering the art of nail design involves more than just painting your nails; it’s about making a statement with color and composition. The application of color theory nail art and the understanding of composition in nail art are vital to create eye-catching designs that resonate with personal style and aesthetic appeal.
The Role of Color Theory in Nail Art
Color theory is the backbone of creating visually appealing nail art. It’s not just about choosing colors you like, but also about how those colors interact with each other. Here are some aspects to consider:
- Complementary Colors: These are colors opposite each other on the color wheel, such as blue and orange or red and green. They create high contrast and make each other pop, perfect for a bold look.
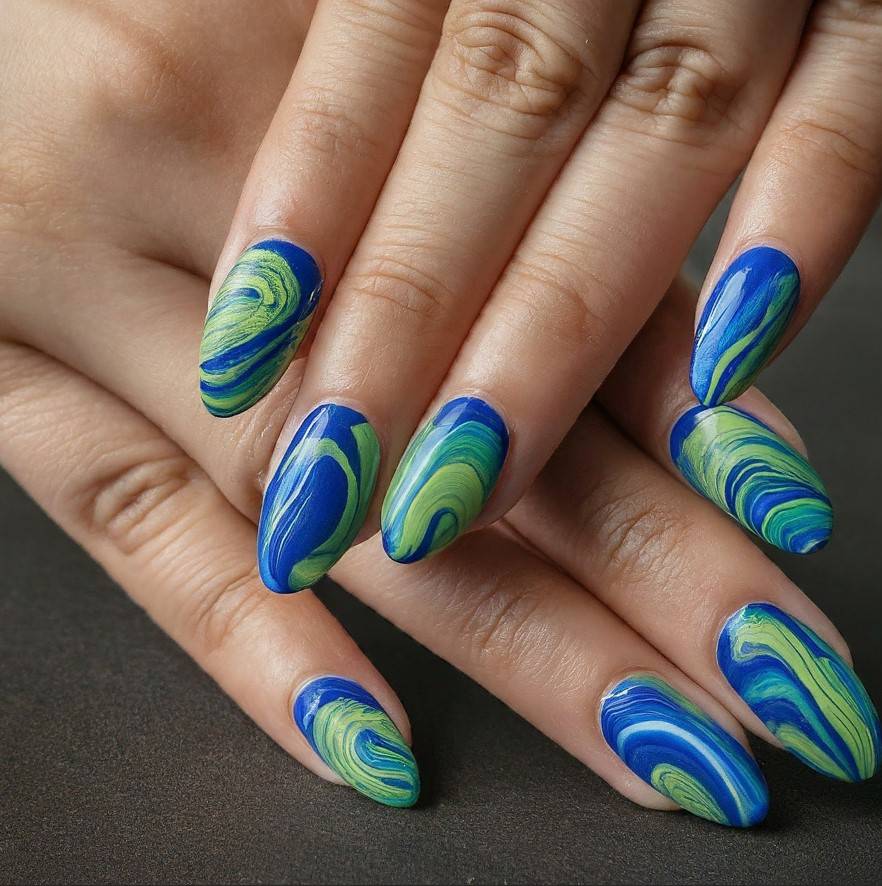
- Analogous Colors: These are colors next to each other on the color wheel, like blue, blue-green, and green. This combination creates a harmonious and serene look.
- Triadic Colors: A triadic color scheme involves three evenly spaced colors on the color wheel. For example, red, yellow, and blue. This scheme offers vibrant contrasts while retaining harmony.
Understanding these relationships helps in selecting color combinations that will enhance your nail art designs.
Creating Balance with Composition
Composition refers to how you arrange elements on your nails. It’s crucial for establishing balance and bringing your design together cohesively. Consider these tips:
- Symmetry vs. Asymmetry: Symmetrical designs mirror one side to another and can convey a sense of order and calmness. Asymmetrical designs use different elements on each side for a more dynamic and interesting look.
- Focal Point: Decide which part of the nail you want to draw attention to. A focal point could be a glitter accent or a detailed pattern on one nail while keeping others more subdued.
- Visual Weight: Different colors have different visual weights; darker shades draw more attention than lighter ones. Distribute visual weight evenly by using darker colors sparingly if you want a balanced look.
By incorporating these principles into your nail art projects, you can achieve stunning results that speak volumes about your creativity.
Application Tips
When applying these concepts:
- Start with a base color that sets the tone for your design.
- Choose additional colors based on the type of contrast you want to achieve.
- Think about the placement of these colors – how they will flow from one nail to another.
- Use tools like dotting pens or striping tape to create clean lines and patterns.
Each time you sit down to paint your nails, remember that you’re crafting miniature works of art. With practice, integrating color theory and composition becomes second nature, allowing for endless possibilities in personalizing your manicure.
By focusing on these artistic principles, beginners can quickly elevate their skills in nail artistry. The journey from simple polishes to intricate masterpieces relies heavily on these foundational concepts.
Maintaining and Removing Your Nail Art Like a Pro
Creating beautiful nail art is just one part of the equation; ensuring it stands the test of time is another. Proper nail art maintenance not only extends the life of your designs but also keeps them looking fresh and vibrant.
Tips for Nail Art Longevity
- Apply a Top Coat: A top coat acts as a sealant and provides a protective barrier against chips and scratches. For best results, apply a thin layer immediately after your nail art has dried, and reapply every 2-3 days.
- Gloves are Your Friends: When doing household chores that involve water or chemicals, such as washing dishes or cleaning, wear gloves to prevent premature chipping.
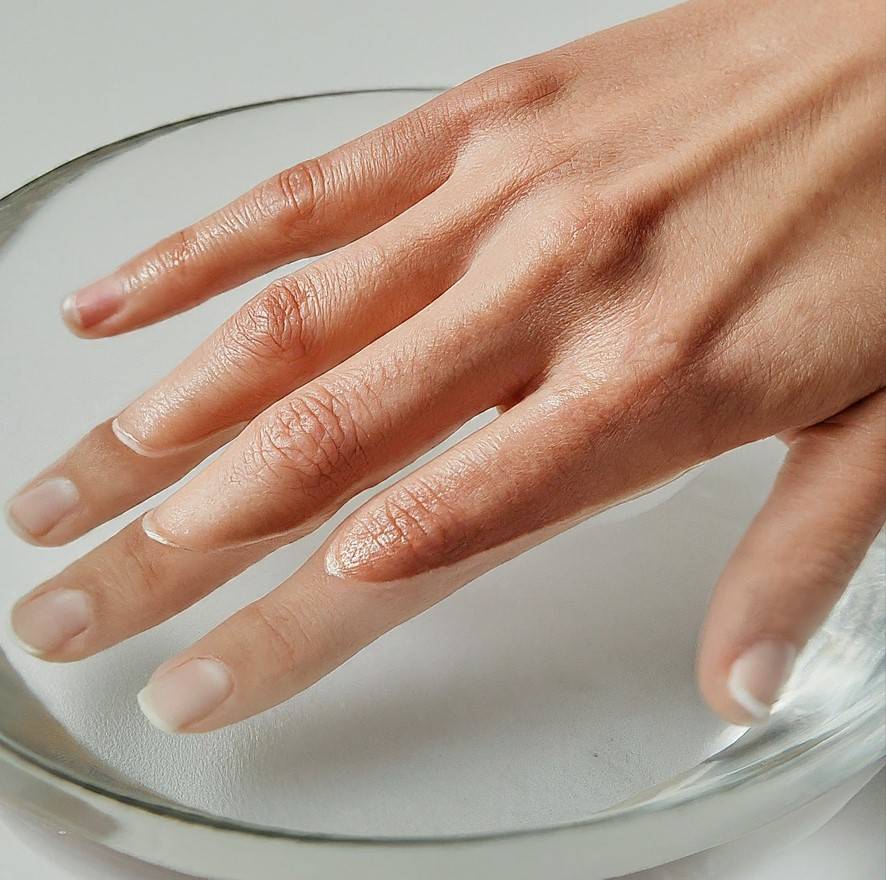
- Hydration is Key: Moisturize your cuticles and hands regularly. Well-hydrated skin means less brittleness in your nails which can contribute to the longevity of your nail art.
- Avoid Harsh Activities: Be mindful of activities that can damage your nail art. Use tools instead of your fingernails to open cans or packages.
Nail Polish Removal Done Right
When it’s time to bid farewell to your nail art, removing it safely ensures you avoid any damage to your nails.
- Gentle Nail Polish Remover: Opt for an acetone-free remover to avoid drying out your nails and cuticles.
- Soak Cotton Balls: Saturate cotton balls with nail polish remover, place them on top of each nail, and wrap with foil. After a few minutes, the nail polish should wipe off easily.
- Never Peel or Scrape Off Polish: Peeling off polish can remove the top layer of your nail bed along with it. Always use an appropriate remover.
- Care for Your Nails Post-Removal: After removing the polish, wash your hands and apply a nourishing oil or cream to replenish moisture in your nails and cuticles.
By implementing these strategies for maintenance and removal, you ensure the integrity of your natural nails while enjoying an array of artistic designs. Remember, taking care of your nails between applications is as crucial as the application itself. With these practices in place, you’re one step closer to achieving salon-quality results in the comfort of your own home.
Finding Inspiration from Honolulu’s Vibrant Nail Art Scene
When it comes to nail art inspiration, Honolulu stands out as a city teeming with creative energy. The nail art scene here thrives on the unique blend of styles influenced by the island’s culture and natural beauty.
Vibrant Colors and Tropical Motifs
Exploring the local trends, one cannot help but notice the vibrant colors and tropical motifs that often grace the nails of Honolulu’s stylish set. The azure blues of the Pacific Ocean, lush green hues of the rainforest, and bright colors of exotic flora frequently serve as a palette for these designs.
Impressive Window Displays
Taking a stroll through city streets, you’ll encounter numerous nail salons showcasing impressive window displays. These displays are a direct reflection of Honolulu’s dynamic nail art culture. This visual feast serves as a source of inspiration for both beginners and advanced nail artists alike.
Nail Art Workshops
In addition to this, many salons in Honolulu offer nail art workshops. Participating in these workshops can be an excellent opportunity to learn from experienced professionals and immerse yourself in the local culture.
Traditional Hawaiian Elements
What sets Honolulu apart is its unique fusion of traditional Hawaiian elements with contemporary nail art techniques. Traditional symbols like hibiscus flowers, palm leaves and waves often feature in designs, elevating them with a touch of island flair.
Social Media Influence
Social media platforms also play a significant role in promoting Honolulu’s vibrant nail art scene. Local artists frequently share their creations on Instagram using the hashtag #HonoluluNailArt. Scrolling through these posts provides an endless source of inspiration, revealing stunning designs ranging from minimalist chic to intricate patterns.
Why Choose Honolulu for Nail Art Inspiration?
To sum it up, when it comes to finding nail art inspiration, looking towards Honolulu can be highly rewarding. Its vibrant scene offers a wealth of ideas that marry tradition with modernity, nature with imagination, all underlined by the inherent beauty and spirit of this Pacific paradise.
So whether you are a beginner or an experienced nail artist, the thriving nail art community in Honolulu has something to inspire everyone. Be it the rich color palette inspired by the local landscape, traditional motifs, or innovative techniques, there’s a world of creativity waiting to be explored.
The Best Nail Salons in Honolulu for Artistic Manicures
Unleashing your creativity at home can be rewarding, but there are also times when you might want to sit back and let professionals work their magic. If you’re seeking an artistic manicure that transcends the ordinary, here are our top picks of the best nail salons in Honolulu that specialize in stunning nail art designs.
1. Honolulunailsalons.com:
With over 20 years of experience and an award-winning status, this salon has rightfully earned its reputation as one of the top 3 nail salons in Honolulu. Their talented artists are renowned for turning nails into miniature canvases that reflect both personal style and current trends.
2. Glamour Salon:
Known for their creative flair and attention to detail, Glamour Salon is a must-visit for anyone wanting to make a bold statement with their nails. They excel in intricate designs and often incorporate elements of Hawaii’s culture and natural beauty into their work.
3. Nail Lovers Spa:
This salon is a haven for those who love playful and colorful nail art. From whimsical patterns to elegant themes, the artists at Nail Lovers Spa have a knack for creating nail art that draws attention and compliments.
4. Zen Nails & Spa:
If it’s relaxation you’re after, look no further than Zen Nails & Spa. Here, you can enjoy a tranquil environment while skilled technicians transform your nails with beautiful designs.
Choosing the right salon can elevate your nail art experience from ordinary to extraordinary. Remember, each salon has its unique strengths and specialties; it’s all about finding the one that matches your style and expectations best.
Each of these salons not only offers exceptional service but also inspires with their innovative approaches to nail artistry. So whether you’re looking for inspiration or simply want to treat yourself, these nail art salons in Honolulu are the go-to spots for a truly artistic manicure.
Bringing Out Your Inner Nail Artist: Tips for Communicating Your Ideas to a Salon Professional
Crafting nail art at home can be a fun, creative journey. Yet, there are occasions where the craftsmanship of a skilled nail technician is desired to bring your ideas to life. Effectively communicating your nail art vision at a salon is key in these instances.
1. Be Prepared with Examples
Arrive prepared when communicating nail art ideas to salon professionals. Bring along images or sketches of the design you have in mind. Visual references are beneficial aids that eliminate guesswork and ensure that both you and the technician are on the same page.
2. Speak Up
Don’t be shy about expressing your desires. If a particular shade or design element doesn’t sit right with you, voice out your concerns. Remember, it’s your manicure, and you should love the final result.
3. Ask for Their Expert Opinion
Salon professionals possess a wealth of knowledge about what works best for different nail types and lengths. Feel free to ask them for advice or suggestions. They might propose adjustments that improve the overall look or durability of your chosen design.
4. Understand That Some Designs Might Require More Time
Some intricate designs require more time than others. Be sure to factor this in while scheduling your appointment to avoid rushing the artist and compromising on quality.
These tips will help in effectively communicating your nail art ideas, ensuring that the final result mirrors your envisioned design.
Embrace Your Creativity and Start DIYing Amazing Nail Art at Home!
Nail art at home made simple is not just a phrase; it’s a reality you can achieve with patience and creativity. As you start doing nail art on your own, remember that every artist was once a beginner. Your personal touch adds uniqueness to every design you make.
Final Tips for Beginners:
- Practice Regularly: The best way to improve your skills is through consistent practice. Try out new designs whenever you get the chance.
- Start Small: Begin with simpler designs and gradually work your way up to more complex patterns as you gain confidence.
- Document Your Progress: Keep a photo journal of your nail art. It’s not only rewarding to see how far you’ve come, but it also serves as a reference for future inspiration.
- Join Communities: Connect with others who love nail art. Online forums and social media groups are great places to share tips, tricks, and get feedback.
- Be Patient With Yourself: If a design doesn’t turn out as expected, remember it’s part of the learning process.
- Take Care of Your Nails: Healthy nails are the best canvas. Ensure you maintain good nail health by staying hydrated and using nourishing products.
Embark on this creative journey with an open mind and heart. Enjoy each stroke of the brush and the expression of your individuality. Remember, nail art at home made simple is about the process as much as the beautiful results on your fingertips!
FAQs (Frequently Asked Questions)
What are the benefits of trying out nail art at home?
Trying out nail art at home can save you money and provide the convenience of doing it on your own schedule.
What are some basic nail art techniques for beginners to get started with?
Beginners can start with easy yet impressive nail art techniques like dotting, gradient, and accent nails. These are simple techniques that can create stunning designs.
Can you provide some simple and stylish nail art ideas for beginners?
Yes, we have step-by-step instructions for 10 gorgeous nail art looks that are perfect for beginners. These designs can be adapted to suit your personal style.
What advanced nail art techniques and creative trends can beginners explore?
Beginners can challenge themselves by trying more advanced techniques like stamping, freehand painting, and 3D embellishments. We also provide guidance on current trends in the world of nail art.
How can I maintain my nail art and make it last longer?
You can make your nail art last longer by applying top coat and avoiding common pitfalls. We provide essential tips for maintaining your nail art.
Where can I find inspiration from Honolulu’s vibrant nail art scene?
You can find inspiration from Honolulu’s thriving nail art community known for its unique blend of styles influenced by the island’s culture and natural beauty. We take a closer look at this in our guide.